I was walking down past some shops one day and saw a speaker that was built into a suite case.
It was already sold, and when they told me how much it sold for I was intrigued and curious as to what as to how hard it would be to make my own.
I started out by picking an amplifier, I picked the Sure 2 X 15 Watt Class D Audio Amplifier Board – TA2024
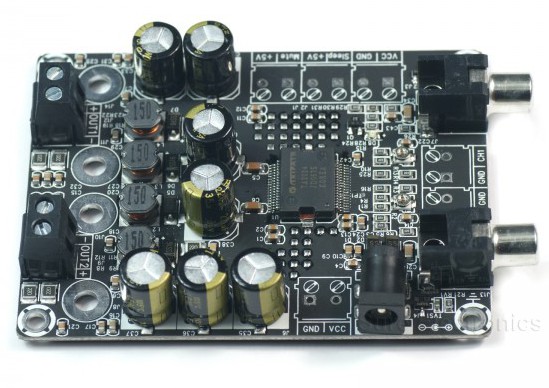
because it had standard connectors so it was going to be easy to prototype with, but could also be soldered to for the finished product. It doesn’t have any kind of volume control, but that is remedied with a 10k potentiometer across the inputs.

source http://accusafe.nl/
That was okay for most devices, but my iPod Classic with the volume up full made the knobs action wonky, and it wouldn’t go all the way quiet, adding a 1.2k resistor across it smoothed things about
EDIT:I’d wired up the knob backwards, the outputs have to be on the middle section of the potentiometer, DERP.
the next stop was picking a suite case, originally I had chosen a brown faux leather case 
next step speakers, wanting to do this as cheaply as I could I found some used speakers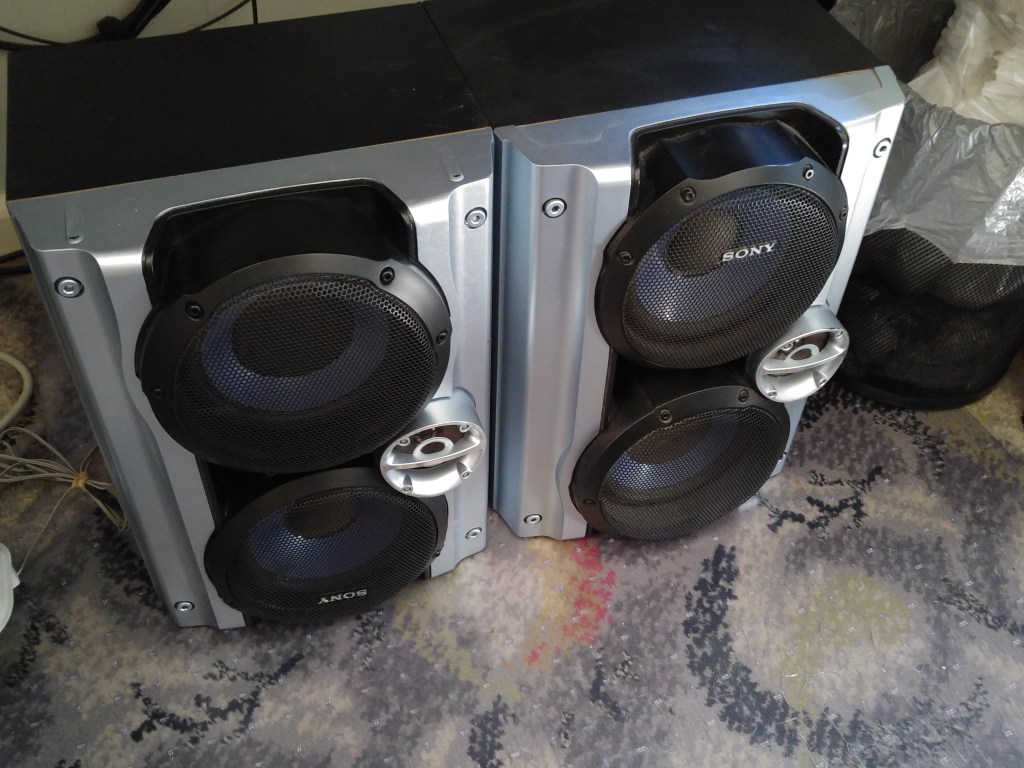
These look like they were from an old hifi, but they were great, they had 3 drivers on each speaker Built in cross overs, admittedly not high end (it was just a 1000uf capacitor), but they worked and I think more drivers the cooler it looks.
That first case ended up not being rigid enough I tried adding some 7mm (1/4inch) plywood inside to stiffen it up, but it didn’t work and ended up making too heavy, so I had to find a new case!!!
There it is.
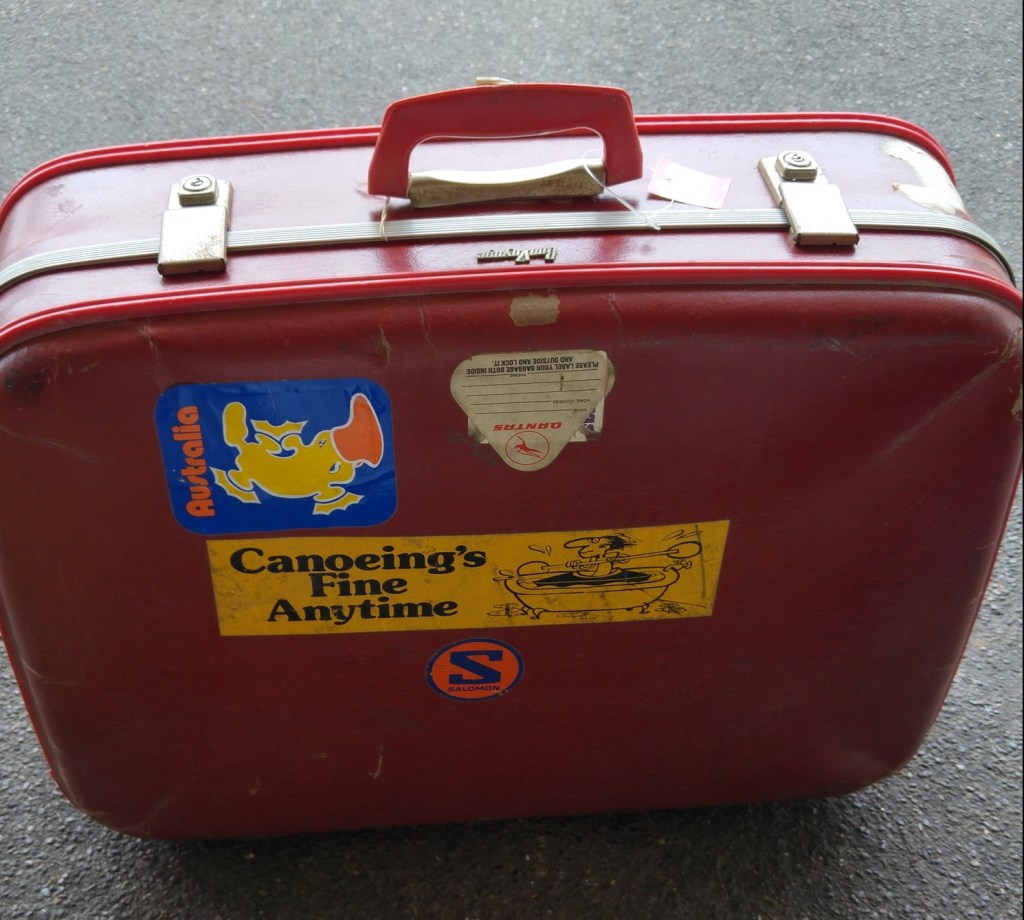
Complete with an old luggage tag, some really cool stickers and I was back in business! It was made of a more rigid cardboard like material I only had to add some 4mm(8th inch) ply on the inside for support. Regular wood glue seemed to be the best but even then due to the curved shape of the suitcase I had some trouble with it coming apart, every speaker hole was touched up around the edges with CA glue. 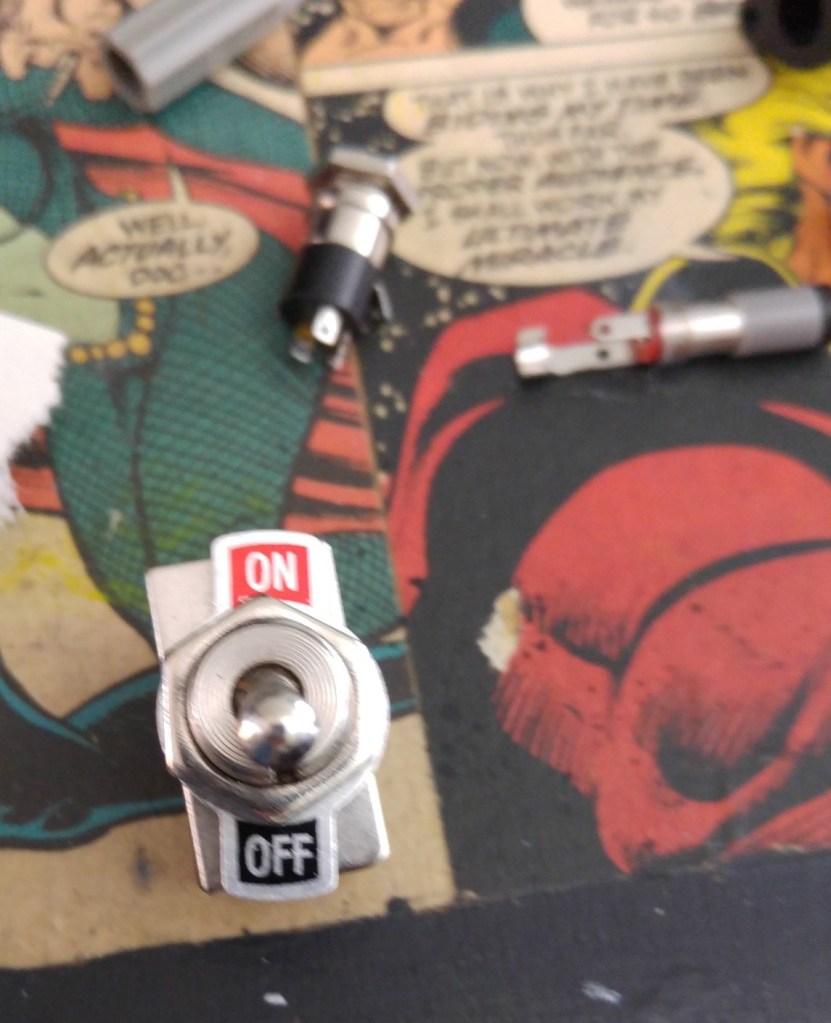
I went to work putting together all the other bits and bobs I’d need and then I built it!
Video log of the build
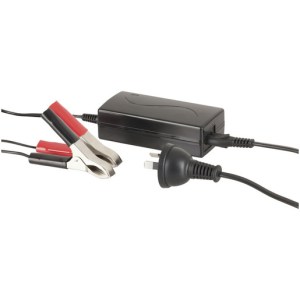
So that video ends with it plugged into the wall not very useful eh? Well I was having trouble deciding what to do with the battery, I ended up going with a 12v 4Ah SLA battery,

it looked something like this
The charger was modified to fit the barrel connector, to make it more user friendly.

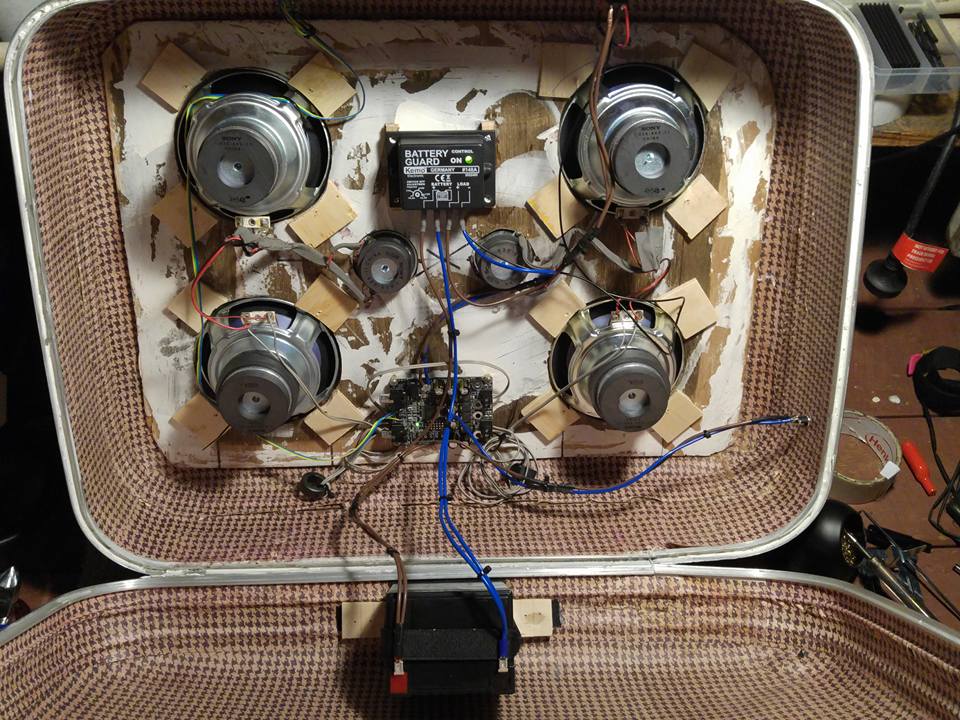
inside of the case, the white is left over from my first attempt of gluing in the plywood
I used an off the shelf product kemo battery guard, it wasn’t cheap but it did the job of keeping the battery from over discharging. I used some sealant in the lip of the suitcase,it helped stop vibrations at loud volumes, I also filled the empty space inside with some cheap pillows to help improve acoustics.
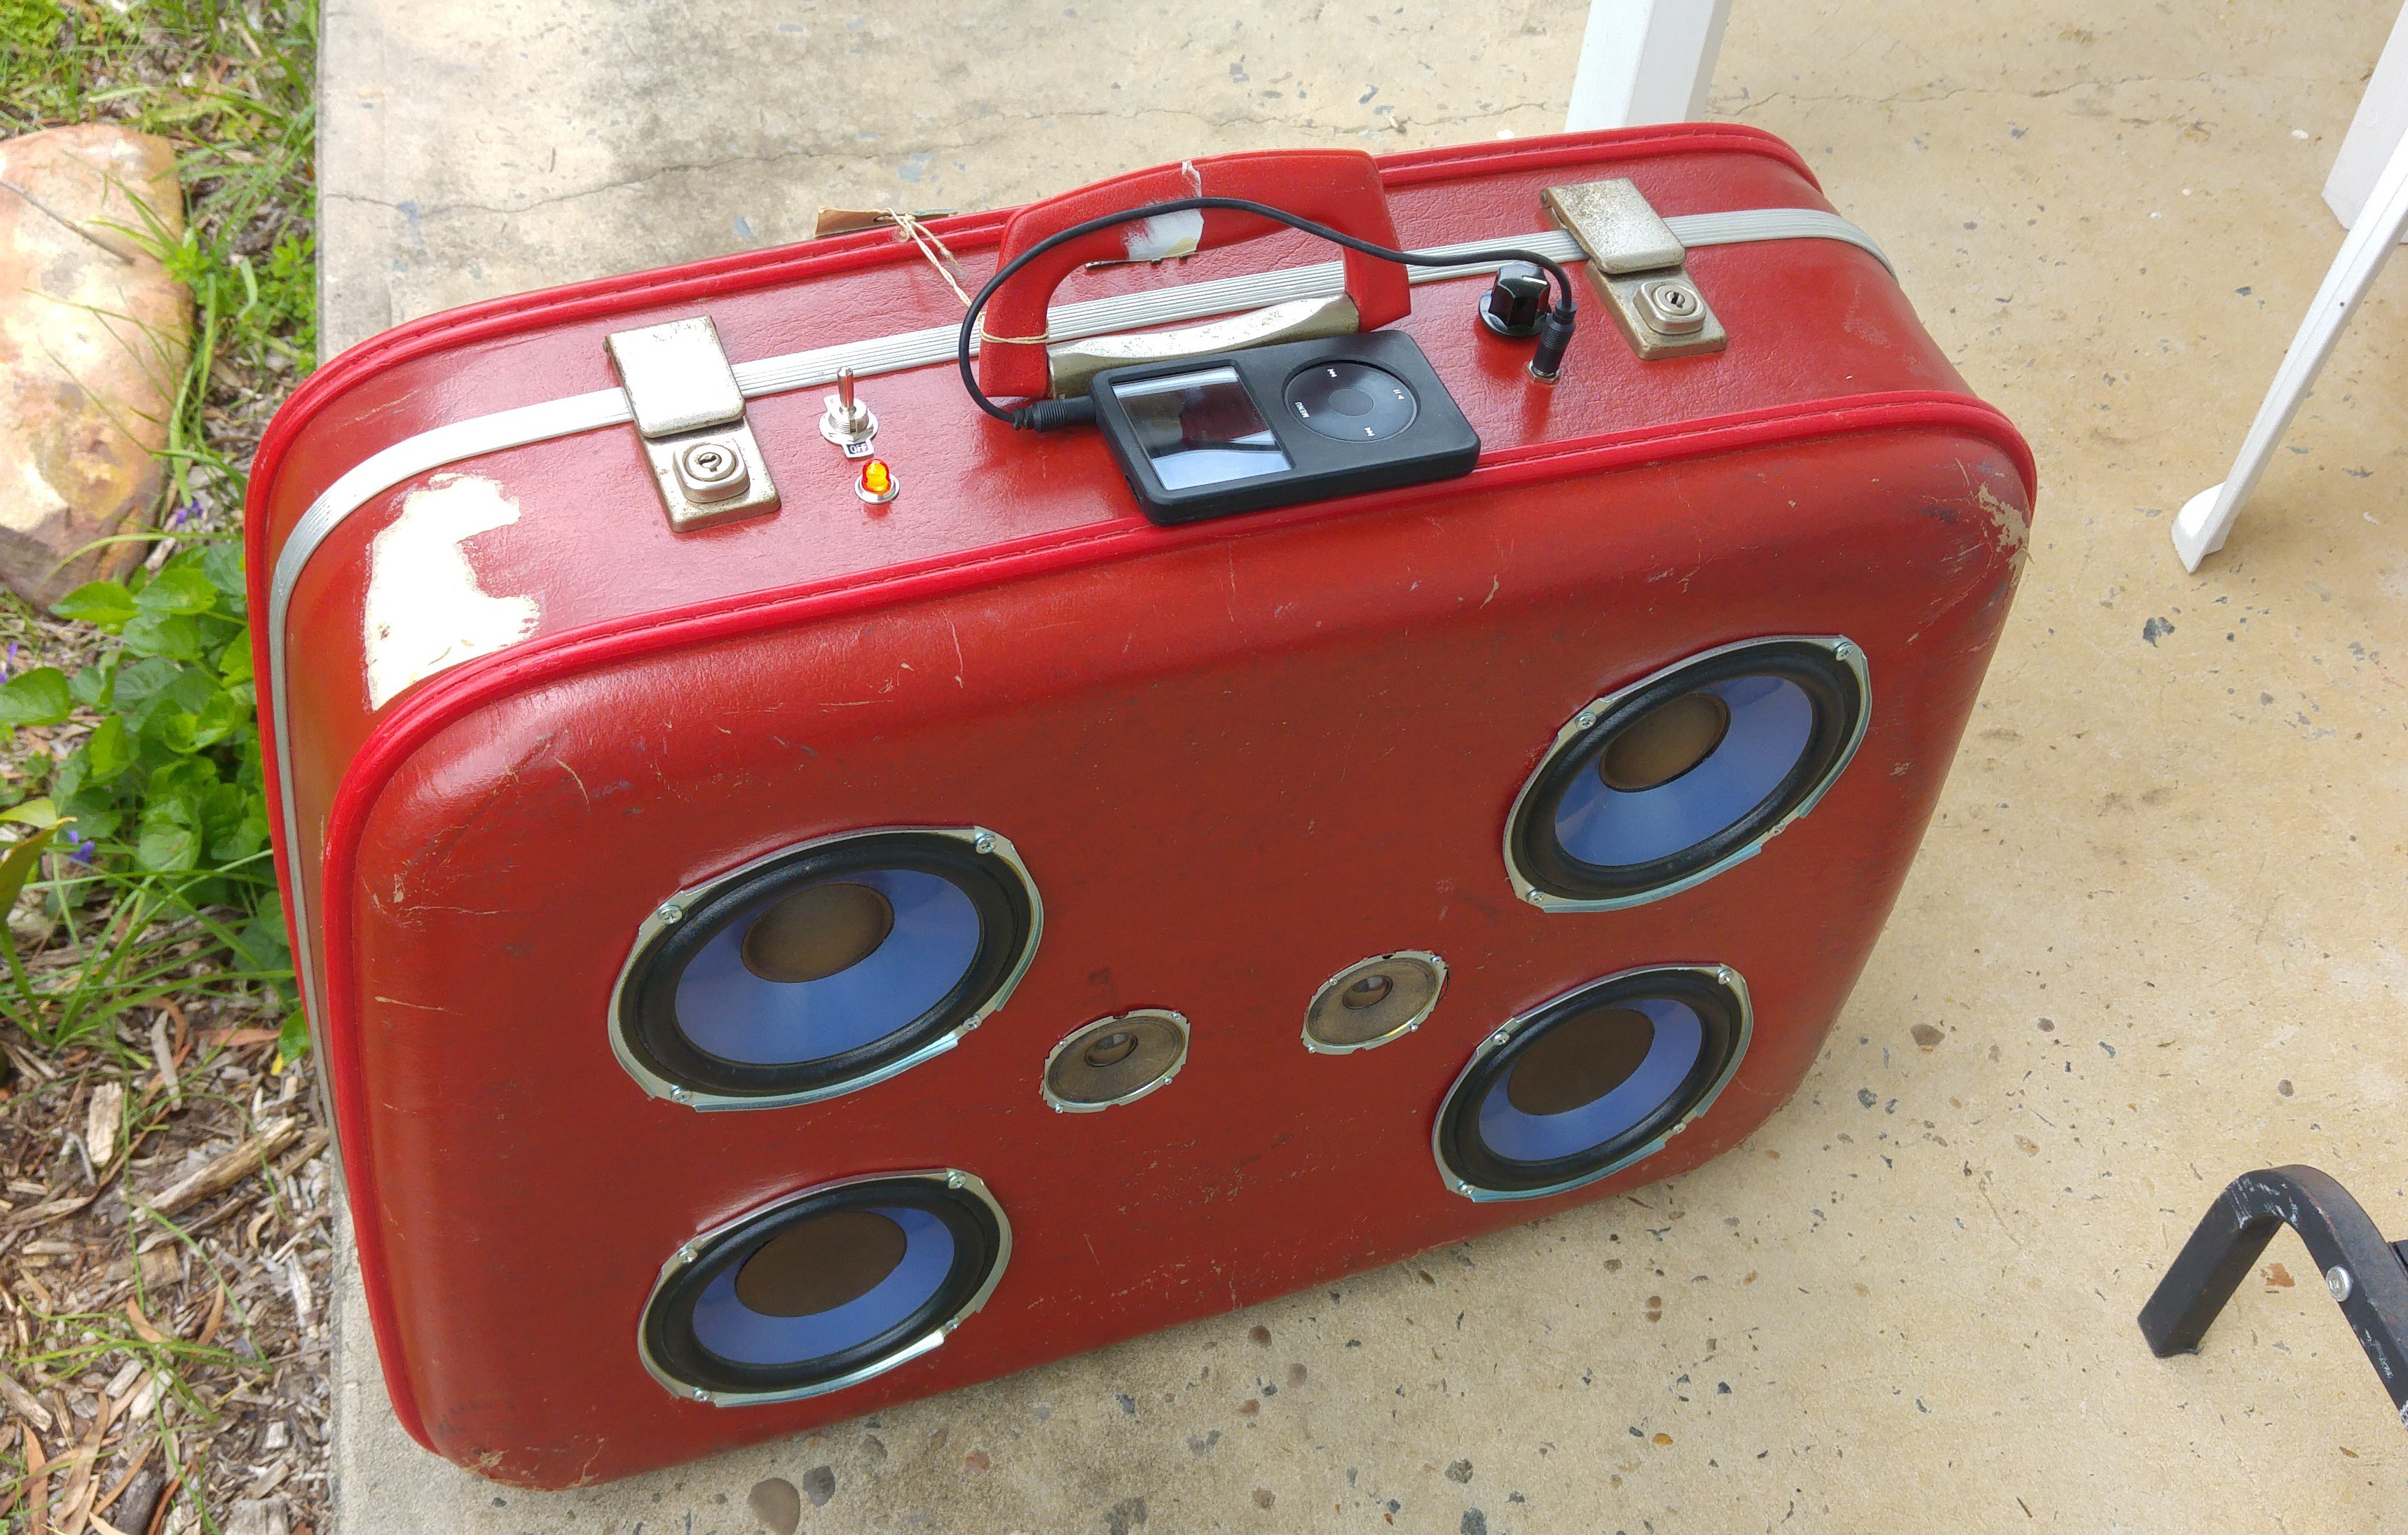
having the ability to charge your phone was something I also wanted, the easiest way was to re-purposing a car lighter charger. This nicely matched the rest of the fittings.
Power in on bottom, power out on the top.
this does sometimes add a little bit of feed back if you’re playing back and charging at the same time, a problem I still haven’t gotten around to fixing.
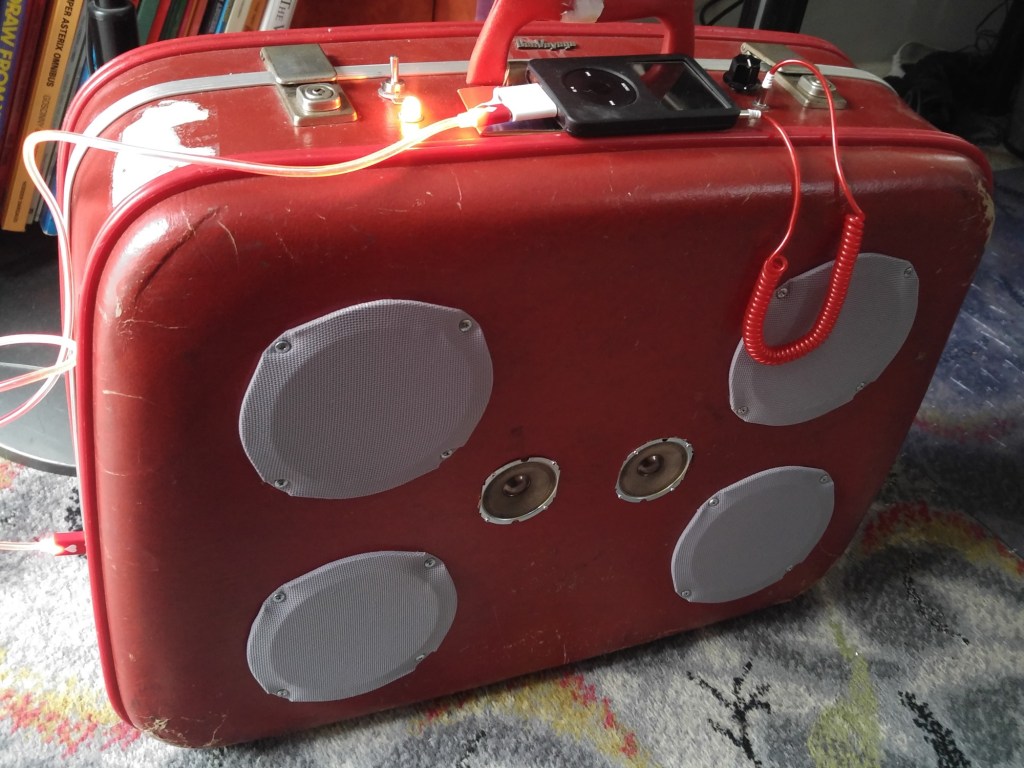
I accessorized with a matching light up USB cable an springy audio cable. I tried to make some speaker grilles but I am not sure how effective they’ll be.
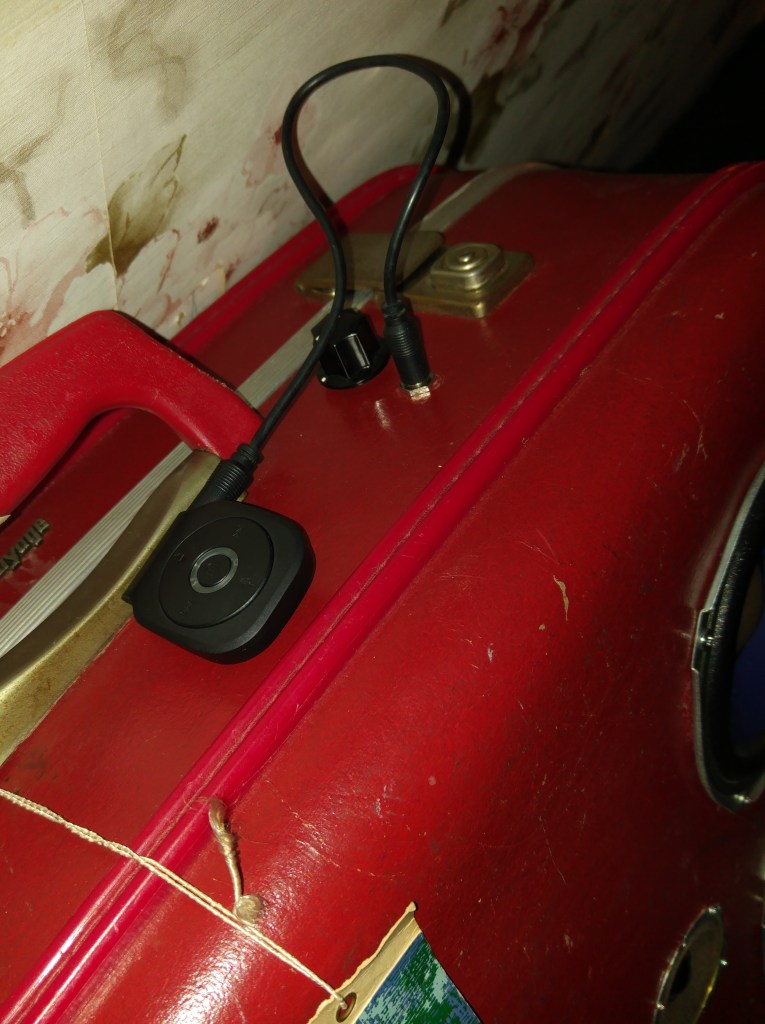
Later iterations will mostly like have bluetooth built in, but for this one I just a little dongle which has the nice ability to change tracks and play/pause
So the good and the bad, good it sounds great is reasonable lug-able, weighing in at around 8kg, the bad, well things got expensive with the battery and all the little stuff added up and it ended up costing me around $200 aud to make this which isn’t too bad but I bet it could be cheaper if I did it again…
JT
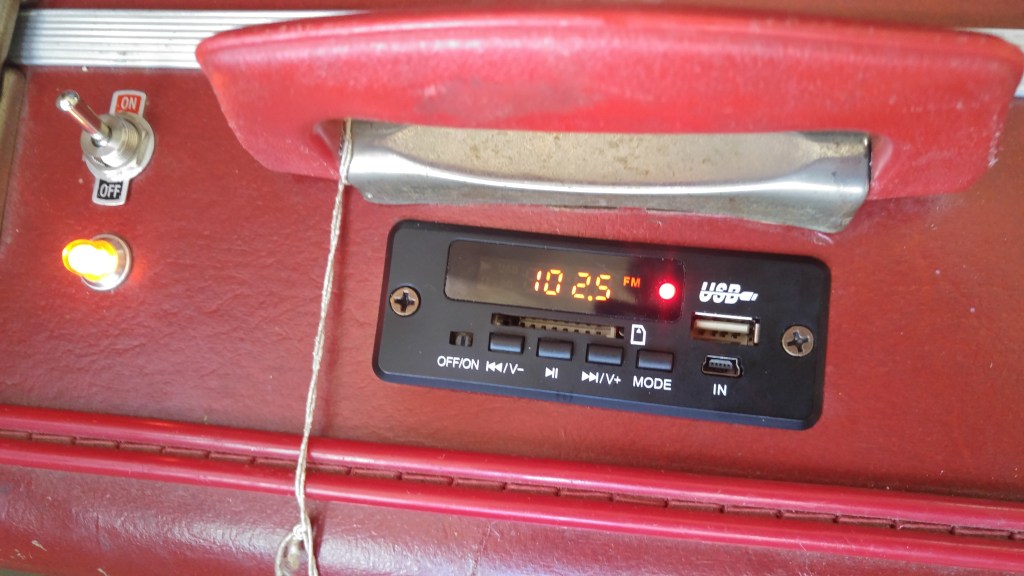
EDIT: One dark an stormy night I hastily a Bluetooth /MP3 USB & SD with FM radio panel, I’ve found it quite useful and it makes the device more independent , and less dependant on your phone.